
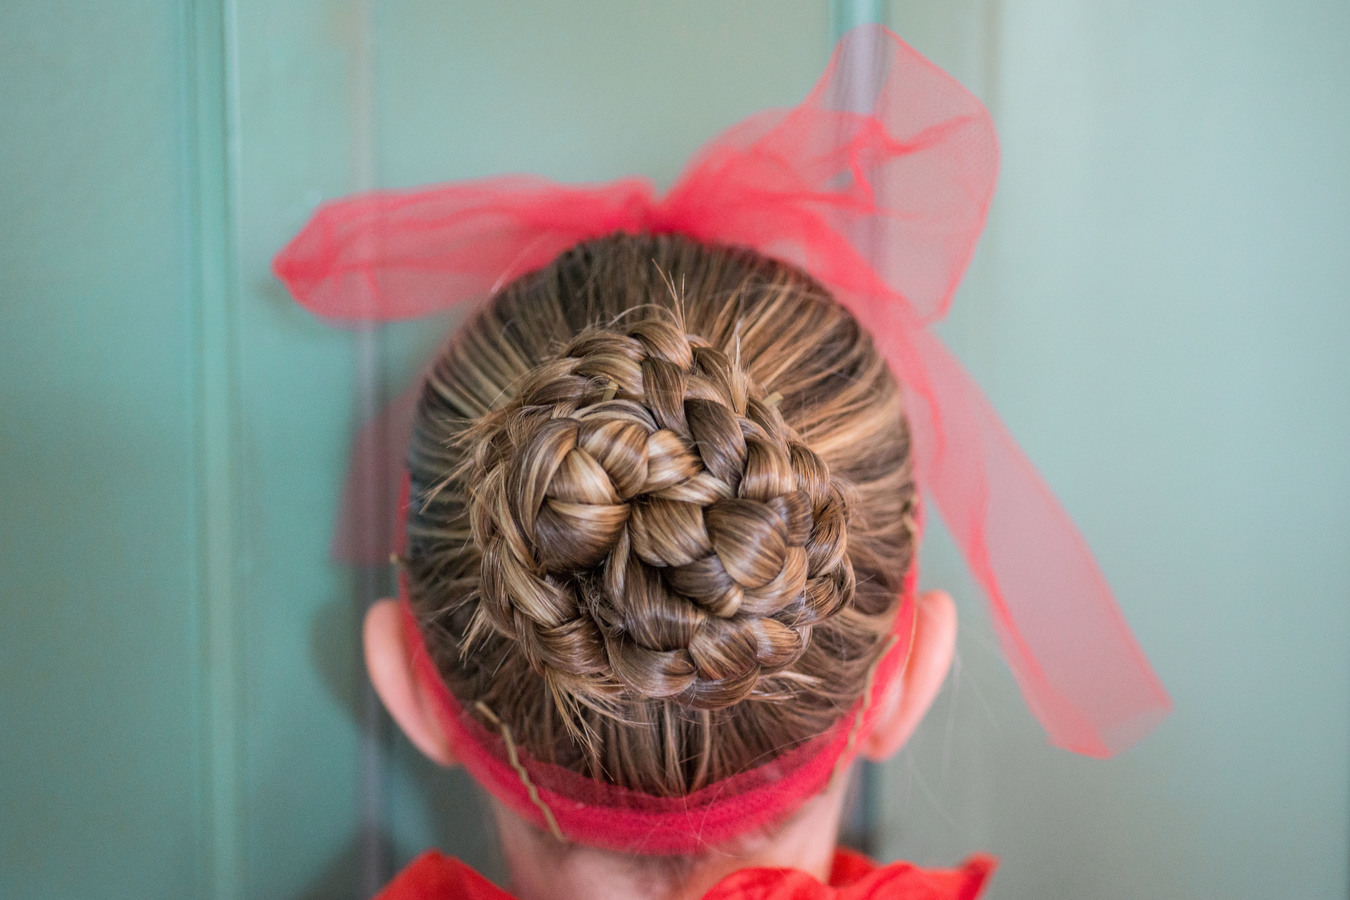
Braids are one of the most beautiful hairstyles that exhibit grace. From cornrows, Dutch braids, French braids to milkmaid braids, waterfall braids, and many others, there is a huge list of braiding styles that you can choose from to flaunt. You might find a braiding technique that elevates your look no matter the occasion. Here, we will discuss how to French braid your own hair!
French braid is famous worldwide because it gives you an elegant look. Needless to say, this is the classiest way to keep the hair off the face and yet look subtly elegant. Whether you are going on a Sunday date or attending an office meeting, this hairstyle is a fit for all places.

However, we generally think that a French braid is extremely difficult to make. But here is a secret, if you know how to make a French braid properly, it will not take more than 5 minutes to rock the style. Wonder how?
This article talks in detail about how to French braid your own hair. Read on to know more.
Table of Contents
How to French braid your own hair?
French braids are one of the prettiest braids and hairstyles that have the power to elevate any and every look. It is elegant, neat, and perfect to wear to almost all places. Unlike people believe, the best part is that a French braid is the easiest to make.
Let us have a look at the steps on how to French braid your own hair:
Prepare your hair
The very first step on how to French braid your own hair is to prepare it for making the braids. For that, take a soft comb and brush your hair neatly backward, ensuring that there is no hair remaining on the forehead.
You can do this on dampened hair (if you do not wish to wash your hair, spray a little water to moisten), or you can do this on dry hair. However, remember that it curls up naturally if braids are done on wet hair.
Divide your hair into sections
Once the hair is all combed properly and set, take a small section from the edge of your top hairline. Ensure it is from eye to eye, or you can also choose the whole length of your forehead.
Make the chunks according to the number of sections you prefer making. Once done, divide the large section of the hair you chose, into three small equal sections, just like any traditional style of braiding. Ensure to separate the sections properly with your fingers.
Start braiding your hair
After making three equal sections, we would begin to make the French braid. At first, we would start with our traditional style of braiding. For that, take two sections of the hair on the right hand and the other on the left hand. Now, take the left section over the middle one and the right section over the middle one and cross the hair strands. Continue doing this traditional style of braiding for two to three steps.
After that, we would start making the French braid. For this, we would begin tucking in hair from both sides alternatively as we proceed. While crossing the left section of the hair over the middle one, add a strand of hair from the left section. Similarly, while crossing over the right section over the middle one, take a small strand of hair from the right part of the hair and add it to the main right section. We would continue doing this till we reach the neckline. All your hair must be tied neatly into a braid by this time.
Once you reach the neckline, take the remaining length of your hair and tie it into a traditional braid.
Tie the hair properly
The last step to ace the French braid is to tie it tightly and properly. For this, use an elastic band of your hair. Ensure that your complete hair is tight at all places to look neat and proper. And your French braid is ready.

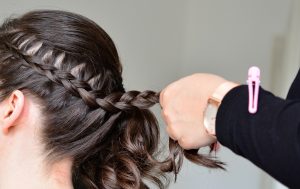
How to French braid your own hair to the side?
A side French braid is one of the most elegant takes on the usual braid. One can say that this braid style lies somewhere between a French braid and a waterfall braid.
How does it look, you wonder? A side French braid starts on one side of the head on the top. It then travels around the head from one part to the opposite lower end weaving in more hair as it travels.
This French braid style gives a chic and classy look that you can ace at almost all places. Whether going on a date for the first time or having fun at the girl’s day out on a Sunday with a cute dress, this hairstyle is sure to compliment all looks.
However, many people are concerned about how to Fench braid your own hair on the sides. In contrary to what many people usually believe, French braiding the hair on the sides requires some really simple steps and can be aced within 10 minutes.
Here are some simple steps on how to French braid your own hair on the sides:
Dampen the hair
The very first step when it comes to French braiding your hair on the side is to make it a little damp. Dampening the hair would ensure that it does not frizz out and is intact in its place. To make the hair damp, spray a small amount of water or use a moisturizer or a gel and comb it nicely.
Put all the hair on the side
A side French braid is where the braid weaves from the top of one side of the head to the lower bottom of the opposite part. Hence, comb all hair on one side of the head and make a side part of making this happen.
Divide the hair into strands
Once done, take a little chunk of your hair from the edge of your hairline and divide it into three parts or sections. The next step is when we start to French braiding your hair.
Begin French braiding your hair
The steps that we are now going to follow are to get our answers to how to French braid your own hair to the sides. Before we begin with the braiding, ensure that all three sections of the hair are equally divided by your fingers.
Once that is ensured, begin braiding like any other normal braids with three sections. Please take the right section and put it over the middle one. Once done, take the left section and cross this one over the middle section.
Add more hair with each step
Once we have at least two braid patterns, we would begin with our french braiding. For this, take a small amount of hair strand from both the right and the left side as you continue weaving your hair.
Take a small strand of hair from the right side and add it to your rightmost section of the braid, and weave. Once done, take a small strand section from the left side of hair and add it to the left section of your braid and weave. Continue doing this until you reach a little above your neckline.
Continue braiding horizontally
Once you have reached the right neckline, start braiding horizontally from right to left. The braids pattern would be similar to what we have been doing so far.
Do regular braids and take a small strand of hair from left and right as we proceed to tuck them into the main braid. The one thing to be kept in mind is to ensure that the braid is kept tight throughout the process. If it becomes loose, the whole braid would look off and improper.
Do a regular braid on the remaining hair
Once you are done horizontally braiding, you will reach the lower opposite side from where you had previously started. You will have some remaining hair left when you get to this point.
The hair length would depend on the length of your hair. From here on, do the traditional braiding. For this, take the three sections of the hair strand. Take the left strand over the middle one and then the right strand over the middle strand. Repeat this process until the complete hair is braided.
Tie the hair securely
Now that we are done with the complete braiding of the hair, the last step is to tie it nicely with an elastic band. Ensure that both the hair and the elastic band are tight and do not come out suddenly and spoil all the effort you have to make your hair look so pretty. Your French side braid is done and ready for you to flaunt to everyone.
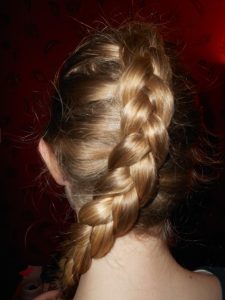
How to Dutch braid your own hair?
Whether you want to elevate a boring look, hide all the grease from your third day after a hair wash, or want to feel good with pretty hair, braids have the magic of making all your wishes come true. There is a long list of stunning braid styles that you can choose. One of such braids that have the capacity of turning your basic look into a classy one is a Dutch braid.
Dutch braids are often confused with cornrows and French braids. The reason is quite obvious – they look extremely similar to each other. A person unaware of these two terms might even call them the same thing, but we know they are not, do we not?
So then, what are Dutch braids? To put it simply, Dutch braised can be called the reverse version of a French braid. The basic difference between both is that when we make a French braid, we take a left and the right strands of the hair and put it over the middle strand of the hair. But in the case of a Dutch braid, we take a right and the left strands of the hair and put them below the middle section of the braids. Sounds quite easy, isn’t it?
Let us thus have a look at the step-by-step process on how to Dutch braid your hair.
Prepare your hair
The first and foremost step you would require to do before you begin to Dutch braid your hair is to make it clean and frizz-free. To ensure it is properly clean, wash your hair and condition it well with a mild shampoo and conditioner.
Once clean, you can either blow dry it or keep it a little damp. Dutch braids can be made on either of the two. If you do not wish to wash your hair, you can spray a little water to dampen it or comb it nicely to avoid any frizz.
However, please note that making a braid on dampened hair will cause it to curl once you untie the hair.
Make your hair into sections
Once you have removed the frizz from your hair, brush it neatly towards the back. The next step is to make a section with your fingers. For this, you can either make a section from one eyebrow to the other or from end to end of the forehead, according to your preference. Once you choose the section, divide it into three equal sections.
Start braiding
If you have read the steps of how to French braid your own hair, making a Dutch braid would be easier to understand for you. To make a Dutch braid, take the three sections on your hand.
Put the left section below the middle section and the right section again below the middle section and repeat. As you proceed, keep taking a strand of hair from each side and adding it to the main section. Do this until you reach the neckline.
Once you have reached the neckline, braid the remaining portion of the hair length in the traditional way of braiding. However, remember to maintain the reverse style of braiding. This means taking a left and the right sections and making it go from below the middle section.
Neatly tie your hair
Once done with braiding the hair to the end of the length, the last step is to tie it properly. Use a nice elastic band that fits your hair well to make sure it is not loose. If the braid or the elastic band is loose, the complete hair will not show a fruitful result, and all your efforts will go to waste.
Final thoughts
Now that you know ways to French braid hair, it is time to get ready and exhibit elegance and grace.